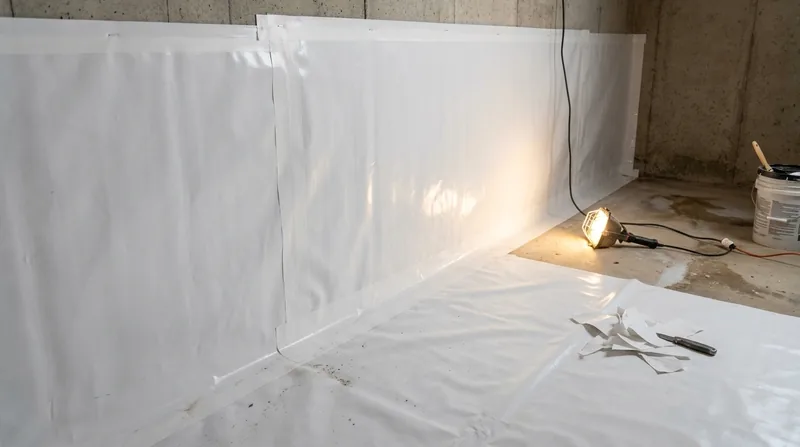




Columbia sits on deep silt loam over clay-rich subsoil, and that clay does two things that matter below grade: it swells when wet and cracks when dry. In the 1900s-1940s brick and frame houses of Benton-Stephens, Old Southwest and Old Hawthorne, many full basements are fieldstone or early block, and ground moisture vapor moves through those walls year round. Across North Central, Douglass Park and the Stephens Lake area, 1950s-1970s ranches and split-levels have partial or daylight basements cut into the slope, where a slab wicks moisture straight up into the room. We install Vapor Barrier Installation in Columbia to block that vapor at the wall and slab, with sealed seams, taped terminations and sump integration where the floor drains. If you have read about our full basement waterproofing approach, the vapor barrier is the moisture-control layer that finishes the job.
Why Vapor Barrier Installation Matters in Columbia's Clay and Creek-Bottom Basements
The failure mode that dominates here is not a single gushing crack. It is chronic vapor drive: humid summers, heavy spring thunderstorms, and a water table that rises near Hinkson and Flat Branch creeks push moisture through block and poured walls, then it condenses on cool basement surfaces. That is why you see efflorescence blooms, a musty basement smell, and rust on stored tools even when the floor looks dry. A properly sealed barrier stops the vapor before it reaches the living side of the wall.
- We cover block and poured walls with heavy-duty sheet that resists tearing against rough fieldstone.
- We seal seams and terminations with compatible tape so vapor cannot bypass the panel edges.
- We lap the wall sheet into the slab barrier at the cove joint, where most hidden vapor entry happens.
- We integrate the barrier with the sump basin and interior perimeter drain so water and vapor leave the same way.
Done right, the barrier turns a damp, musty lower level into usable, dry storage and living space without masking the real source of moisture.
Key info: A 1920s fieldstone basement off Old Southwest can read bone dry in February and smell musty by June. That swing is vapor, not a leak, and it is exactly what a sealed barrier is built to control.
For the official word on moisture control and basement finishing in Missouri, the National Weather Service St. Louis office tracks the heavy spring storm cycles that drive groundwater here, and the City of Columbia's building regulations govern any work that alters drainage connections.
How We Install Vapor Barriers in Columbia Basements, Step by Step
We start with a free basement inspection, because a barrier over an active leak traps moisture and makes the problem worse. We check wall seepage after rain, test for hydrostatic pressure at the cove joint, and confirm whether the drain tile and sump pump are moving water. Only then do we spec the barrier system, which is why our installs hold up through Columbia's freeze-thaw swings and wet springs.
- We inspect the walls, slab, cove joint and sump basin, and note any efflorescence or active seepage.
- We correct the water source first, with crack injection or an interior drain tile system where pressure is the real cause.
- We clean and prep the wall surface, removing loose parging and mineral bloom so the sheet sits flat.
- We hang heavy-duty barrier sheet from the top plate down, lapping panels and sealing every seam with tape.
- We run a dimple board or drainage plane where the wall needs to shed water to the perimeter drain.
- We tie the wall sheet into the slab barrier and seal the sump basin penetration with a gasketed lid.
- We tape terminations at the rim, corners and penetrations, then walk the job with you before we leave.
Every step is documented, so you know what was sealed and where the barrier ties into the drainage system.
Key info: On a 1960s split-level near Stephens Lake, the slab was wicking moisture into carpet at the base of the wall. We sealed the cove joint, tied the wall barrier into a new sump basin, and the carpet stayed dry through the next spring storm cycle.
Vapor Barrier Approaches We Use in Columbia Homes
Not every basement needs the same system. A poured-concrete walkout in Nifong Park behaves differently from a fieldstone full basement near the Hinkson Creek corridor, and a slab-on-grade tract home in the south and east subdivisions needs a different tie-in than a daylight basement cut into the slope. We match the approach to the wall type, the water table, and whether a drain tile system is already in place.
| Approach | Description | Best for |
|---|---|---|
| Wall sheet barrier | Heavy-duty sheet hung over block or poured walls, seams taped and terminations sealed. | Full basements with efflorescence and musty smell but no active seepage. |
| Slab barrier with cove seal | Sheet laid over the slab and lapped into the wall sheet, sealing the cove joint. | Daylight and partial basements where moisture wicks up through the floor. |
| Dimple board drainage plane | Drainage mat against the wall that channels water down to the interior perimeter drain. | Walls with hydrostatic pressure or a history of seepage after storms. |
| Sump-integrated barrier | Barrier tied to a gasketed sump basin lid with a sealed discharge penetration. | Basements with an existing interior drain tile and sump pump. |
| Membrane over rough fieldstone | Heavy sheet plus parging prep so the barrier sits flat on uneven 1900s walls. | Old Southwest and Old Hawthorne homes with fieldstone foundations. |
We pick the lightest system that solves the actual moisture problem, and we tell you plainly when a barrier alone will not fix hydrostatic pressure.
Vapor Barrier Installation Cost in Columbia: What to Expect
Most Columbia vapor barrier jobs start around From $3/sq ft for wall and slab coverage, and the final number depends on wall length, ceiling height, and how much prep the surface needs. A smooth poured wall in a 1990s Nifong Park subdivision is faster to cover than rough fieldstone in Benton-Stephens, where parging prep adds labor. Sump integration, dimple board, and sealing multiple penetrations each move the price up. We do not quote a firm number until we have walked the basement.
Access matters too: a finished basement with paneling and stored furniture takes longer to prep and protect than an empty one. If the inspection finds active seepage, we price the water source fix separately so you can see exactly what each part costs. Getting two or three written estimates is smart, and you should compare scope, not just the bottom line. Our full pricing overview breaks down the line items.
Hiring a Vapor Barrier Contractor Near Me in Columbia: What Homeowners Should Check
Vapor barrier work is only as good as the prep and the sealing, and a cheap install over an active leak will trap moisture and make the basement smell worse. Ask whether the contractor inspects the drainage first, and whether they will say plainly when a barrier is not the right fix. That honesty is the difference between a dry basement and a callback.
- Confirm the contractor is licensed and insured, and ask for the certificate before work starts.
- Get two or three written estimates that list wall length, prep, materials and sump tie-in separately.
- Ask for local references from basements with the same wall type as yours, fieldstone or poured.
- Check whether a permit is needed for any drainage or sump discharge work, and confirm the local building department's rules.
- Ask how seams, corners and sump penetrations are sealed, and get that in writing.
If a contractor will not put the sealing details in writing, keep looking. You can contact us for a free estimate and we will walk the basement with you before any number is quoted.
Vapor Barrier Installation in Columbia: Pricing Guide
| Service | Price | Details |
|---|---|---|
| Wall sheet barrier only | Starting at $3/sq ft | Covers block or poured walls with sealed seams and taped terminations, prep included. |
| Wall and slab barrier | Starting at $4/sq ft | Adds slab coverage and a sealed cove joint where most hidden vapor entry occurs. |
| Sump-integrated barrier | Starting at $5/sq ft | Ties the barrier to a gasketed sump basin lid with a sealed discharge penetration. |
| Fieldstone prep and membrane | On estimate | Rough 1900s walls need parging prep before the sheet sits flat, so we look first. |
| Travel | Included | In Columbia and surrounding areas, no separate call-out or mileage fee. |
| Estimate | Free | Response within 24h at (573) 818-2013, no obligation to book. |
Indicative pricing, the exact cost depends on square footage, finish, and site access. Free personalized estimate within 24h at (573) 818-2013.


